cal16v's WIP
Re: cal16v's WIP
BigDaz wrote:... it wont matter what colour i get will get them re trimmed black/yellow
Sent from my Galaxy S6 Edge using tapatalk
Ironic. I was all set to get these and then have them re trimmed!
- Attachments
-
- $_20.JPG (33.67 KiB) Viewed 12567 times
-
- ClubCalibra.net

- Posts: 220
- Joined: Tue Apr 15, 2014 11:19 am
- Location: Sydney Aus
-
- ClubCalibra.net
- Posts: 220
- Joined: Tue Apr 15, 2014 11:19 am
- Location: Sydney Aus
Re: cal16v's WIP
Nice job! Tbh, I like them both ways but I think the all black edition will suit the rest of the Cally interior a bit better - unless you want to "grey-up" the back seats!!!
-

- Site Admin

- Posts: 496
- Joined: Tue Jan 05, 2016 11:26 pm
- Location: Linköping, Sweden
Re: cal16v's WIP
Cliff wrote:Nice job! Tbh, I like them both ways but I think the all black edition will suit the rest of the Cally interior a bit better - unless you want to "grey-up" the back seats!!!
A tip for anyone using fabric paints/dyes for fabric upholstery recolouring...
To avoid 'hardening' the fabric after the colour has dried, first mix a solution of 25% fabric softener, 25% white vinegar and 50% water and mist the fabric until it wets. Apply a light coat of colour and re-mist in between coats until you have sufficient coverage.
There is no need to wet down vinyl or leather.
-
- ClubCalibra.net
- Posts: 220
- Joined: Tue Apr 15, 2014 11:19 am
- Location: Sydney Aus
Re: cal16v's WIP
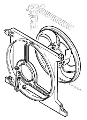
Picked up a near new battery and radiator from a lad parting out a Cali he unfortunately had a front ender in.
Also the original twin horn unit as I have no clue what happened to mine tbh and the bonnet lining which needs cleaning and a refurb.
Also the original twin horn unit as I have no clue what happened to mine tbh and the bonnet lining which needs cleaning and a refurb.
-
- ClubCalibra.net
- Posts: 220
- Joined: Tue Apr 15, 2014 11:19 am
- Location: Sydney Aus
Re: cal16v's WIP
...
- Attachments
-
- Cleaned up front inner guards
-
- and this filthy piece of s!@t
-
- Nice find...
-
- ClubCalibra.net
- Posts: 220
- Joined: Tue Apr 15, 2014 11:19 am
- Location: Sydney Aus
Re: cal16v's WIP
Inner guards are back on and cleaned up the front wheels a little. Wouldn't mind some other opinions on these wheels... never envisaged hanging on to them tbh but perhaps they're growing on me.
A few more pics of under the bonnet but still so much left to do... looking better without the bright yellow/blue battery
Started cleaning up the bonnet liner... hope you can see the difference in the small rectangular section I cleaned
A few more pics of under the bonnet but still so much left to do... looking better without the bright yellow/blue battery
Started cleaning up the bonnet liner... hope you can see the difference in the small rectangular section I cleaned
-
- ClubCalibra.net
- Posts: 220
- Joined: Tue Apr 15, 2014 11:19 am
- Location: Sydney Aus
Re: cal16v's WIP
More tidy up...
Replaced the P/S reservoir bracket and cleaned up the mess of wires and hoses underneath. Cleaned up the ignition module heatsink and refited with new thermal paste.
Replaced the P/S reservoir bracket and cleaned up the mess of wires and hoses underneath. Cleaned up the ignition module heatsink and refited with new thermal paste.
- Attachments
-
-
- ClubCalibra.net
- Posts: 220
- Joined: Tue Apr 15, 2014 11:19 am
- Location: Sydney Aus
Re: cal16v's WIP
Dropped the fuel tank today and painted the rear underbody with bitumen. Cleaned the inside of the tank and painted the outside in matt black. Metal tank straps painted and rubbers cleaned. All back together and run the hoses through all their proper clips and fitted rear underbody tray. That just leaves the area behind the rear suspension left to coat and is the next job on my list.
-
- ClubCalibra.net
- Posts: 220
- Joined: Tue Apr 15, 2014 11:19 am
- Location: Sydney Aus
Re: cal16v's WIP
A little hiccup of sorts...
After filling the fuel tank to approx 20 litres the low-fuel warning light is remaining on.
I suspect 1 or more of the following causes;
1. the sender unit is misaligned and fouling the float mechanism.
2. the float arm has been bent out of shape.
3. * some wiring has become detached internally.
I could very well be wrong not having seen the mechanism first hand but due to the fact that the guage is reading accurately and if shorted at the forward wiring plug, the guage reads well past the full mark as expected. This still might be the cause if the warning light feeds off the same 12v feed as the gauge and is in effect an independent circuit of it's own.
If anyone has any thoughts I'd appreciate some ideas...
Last edited by cal16v on Tue Sep 13, 2016 12:46 pm, edited 1 time in total.
-
- ClubCalibra.net
- Posts: 220
- Joined: Tue Apr 15, 2014 11:19 am
- Location: Sydney Aus
Re: cal16v's WIP
After some internet searching on how a fuel sender/gauge actually works it breaks down to a rheostat and a resulting resistive load.
If I understand this correctly the rheostat has a typical range of 40 – 240 ohm load which represents the load at empty and at full tank. Unless the rheostat is inverted where the values are reversed, i.e 240 ohm load at empty and 40 ohm at full.
Is this why when I bridged the multi plug and eliminated the sender unit entirely the low-fuel light remained on? No doubt there was less than 40 ohms present....
Will wiring in some resistors to 150-200 ohm range across the multi plug kill the light and save me from ripping the tank out?
Otherwise I'm stumped.
-
- ClubCalibra.net
- Posts: 220
- Joined: Tue Apr 15, 2014 11:19 am
- Location: Sydney Aus
Re: cal16v's WIP
Problem solved 
A quick look at the wiring diagram shows the the low-fuel warning lamp overlapping the temperature gauge circuit.
I just cleaned the temp/cts contacts and now all is fine.
A quick look at the wiring diagram shows the the low-fuel warning lamp overlapping the temperature gauge circuit.
I just cleaned the temp/cts contacts and now all is fine.
-
- ClubCalibra.net
- Posts: 220
- Joined: Tue Apr 15, 2014 11:19 am
- Location: Sydney Aus
-
- ClubCalibra.net
- Posts: 220
- Joined: Tue Apr 15, 2014 11:19 am
- Location: Sydney Aus
Re: cal16v's WIP
Looking great as always i love reading this thread as am trying to get my se2 up to this level of detail always good to see the updates
Sent from my Galaxy S6 Edge using tapatalk
Sent from my Galaxy S6 Edge using tapatalk
'Once Driven Forever Smitten'
Silver 1992 C2OXE CALLY (Weekend use only)
Se2 1994 C20XE CALLY (On Going Project)
Red 1991 SRI C20XE CAVVY (Been Stored Since 2008)
Red 2016 Insignia VX Line (Daily Driver)
Silver 1992 C2OXE CALLY (Weekend use only)
Se2 1994 C20XE CALLY (On Going Project)
Red 1991 SRI C20XE CAVVY (Been Stored Since 2008)
Red 2016 Insignia VX Line (Daily Driver)
-
- ClubCalibra.net
- Posts: 244
- Joined: Fri Jan 15, 2016 11:32 pm
- Location: Fife Scotland
Re: cal16v's WIP
Cheers BigDaz!
-
- ClubCalibra.net
- Posts: 220
- Joined: Tue Apr 15, 2014 11:19 am
- Location: Sydney Aus
Who is online
Users browsing this forum: No registered users and 33 guests